
Table of Contents
Angular Form Validation: One of the most common features of any web application is providing a form for users to input some data. You use forms daily to log in, register, place orders, etc. Processing user inputs before validating can have serious consequences. You may end up storing invalid data like an incorrect date, email, age, etc. The traditional way to validate HTML forms is by using JavaScript or JQuery. Unfortunately, this approach warrants a bunch of code. Angular, being a full-fledged framework, has provided excellent support for validating user inputs and displaying validation messages. It has lots of commonly used built-in validators that you can take advantage of, or you can even write your custom validators.
Angular Form Validation:
Types of Forms in Angular:
Angular provides 2 different approaches to handling user input through forms.
They are either reactive or template-driven. They both capture events from the view, validate their user input, create a form model and data model to update, and provide a way to track changes.
Reactive forms are more robust. They’re more scalable, reusable, and testable.
Template-driven forms are useful for adding a simple form to an app. They’re easy to add, but they don’t scale as well as reactive forms.
Both kinds of forms share the following building blocks:
- FormControl — tracks the value and validation status of individual form controls
- FormGroup — tracks the same value and status for a collection of form controls
- FormArray — tracks the same value and status for an array of the form control.s.
- ControlValueAccessor — creates a bridge between Angular FormControl instances and native DOM elements.
Validation in Template-Driven Forms:
Angular has provided some built-in validators to validate common use cases. In order to use built-in validators, you would need to apply validation attributes to each form field where you want some validation. These validation attributes are the same as the regular HTML5 validation attributes like required, minlength, maxlength, etc. Under the hod, Angular has provided directives to match these attributes with the validator functions defined in the Angular framework.
Whenever a FormControl’s value changes, Angular generates a list of validation errors by running validation. If the list is empty it means it is a valid status, otherwise, it is an invalid status.
Let’s say we want to put the following validations into it:
As the fields Name and Username have the required attribute, we want to display a validation message if this field is left empty. The Name field should have a value whose minlength and maxlength should be 2 and 30 characters respectively. If the username has spaces, display an invalid username message. For every form-control in which we want to add validation, we need to add appropriate validation attributes and export ngModel to a local template variable:
<input type="text" class="form-control" id="name" required maxlength="30" minlength="2" ngModel name="name"
 #name="ngModel">
In the above example, we have used the following built-in validators – required, minlength, and maxlength. We can use the template variable name in the template to check for validation states of the used validators:
<div *ngIf="name?.invalid && (name?.dirty || name?.touched)" class="alert alert-danger">
 <div *ngIf="name?.errors?.['required']">
   Name is required.
 </div>
 <div *ngIf="name?.errors?.['maxlength']">
   Name cannot be more than 30 characters long.
 </div>
 <div *ngIf="name?.errors?.['minlength']">
   Name must be at least 2 characters long.
 </div>
</div>
As we’ve used a conditional statement to render the first div, it’ll only be displayed if the status of the built-in validator is invalid. We’ve explained at the start of the section how the status is determined as valid or invalid.
Similarly, the inner div will be displayed only if the template variable name has a property error and the errors property has one of the following properties – required, minlength, and maxlength and the property value is true. The template variable binds to the ngModel directive and it receives these properties every time there is any change in the form control and after Angular runs the validation for that field.
Looking for an Angular Development Team?
Share the details of your request and we will provide you with a full-cycle team under one roof.
Note: It is important to check for dirty and touched states, otherwise the error message will be displayed the very first time the page is loaded, which is bad for the user experience. We need the validation message to be displayed in one of the following conditions:
The user changes some value, i.e the field is dirty (formControlObject.dirty)
The user uses tab or clicks to switch focus to some other element, i.e the field was touched (formControlObject.touched)
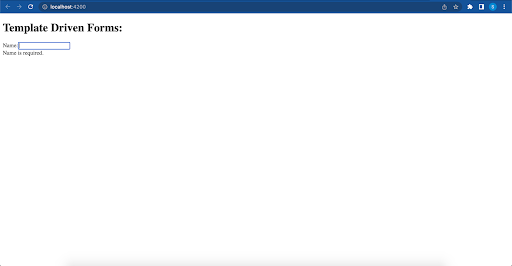
When input field touched and left empty:
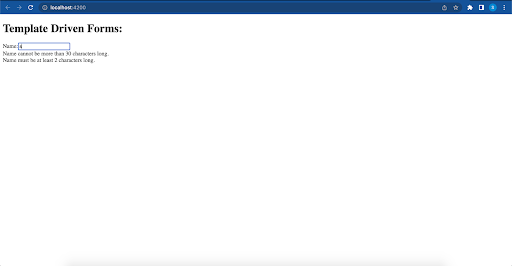
When the input field contains less than two characters:
Validation in Reactive Forms:
In reactive forms, we do not pass the ngModel directive and we also do not use HTML5 validation attributes. We specify validators while creating the objects of the FormControl in the component itself.
Here is the signature of the FormControl class:
class FormControl extends AbstractControl {
 constructor(formState: any = null, validatorOrOpts?: ValidatorFn | AbstractControlOptions | ValidatorFn[], asyncValidator?: AsyncValidatorFn | AsyncValidatorFn[])

 // ...
}
As we can see the first parameter is the initial state of the control which can be kept empty i.e ”. The second parameter is ValidatorFn.
To add the built-in validator functions for a FormControl we can pass it to the appropriate ValidatorFn. For the following example we’ve used the following built-in validators required, minLength, and maxLength:
registrationForm = new FormGroup({
   'name': new FormControl('Enter your name', [
       Validators.required,
       Validators.minLength(2),
       Validators.maxLength(30)
   ]),
   'username': new FormControl('', Validators.required)
Note: You would need to import FormGroup, FormControl, FormBuilder, and Validators in the component.
Please also notice, that unlike Template-driven forms we do not use the validation attributes. We use the respective ValidatorFn like Validators.required, Validators.minLength(2) etc. Your code editor may provide autocomplete for all ValidatorFn the moment you type Validators followed by a dot.
We can go back to the template and write validation messages:
<form [formGroup]="registrationForm">
 <div class="form-group">
   <label for="name">Name:</label>
   <input type="text" class="form-control" id="name" formControlName="name">
   <div
     *ngIf="registrationForm.get('name')?.invalid && (registrationForm.get('name')?.dirty || registrationForm.get('name')?.touched)"
     class="alert alert-danger">
     <div *ngIf="registrationForm.get('name')?.errors?.['required']">
       Name is required.
     </div>
     <div *ngIf="registrationForm.get('name')?.errors?.['maxlength']">
       Name cannot be more than 30 characters long.
     </div>
     <div *ngIf="registrationForm.get('name')?.errors?.['minlength']">
       Name must be at least 2 characters long.
     </div>
   </div>
 </div>
 <br>
 <div class="form-group">
   <label for="username">Username:</label>
   <input type="text" class="form-control" id="username" formControlName="username">
 </div>
 <form>
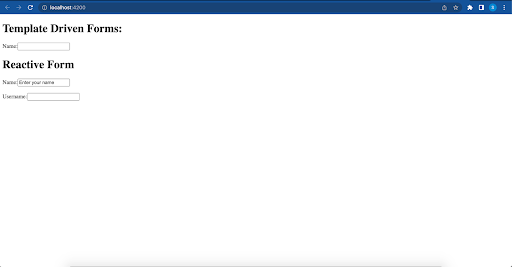
As you can see we have a placeholder in the UI that is defined in the controller:
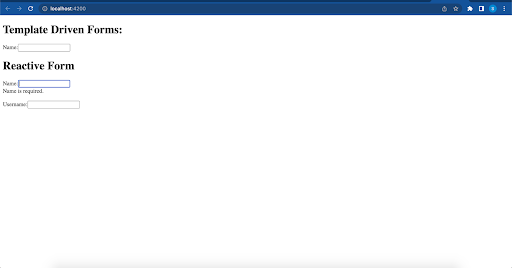
If I remove the placeholder text and made the input field empty then a validation error will come:
For username formControl, no validation is defined. So it’s working as a normal input field in a form.
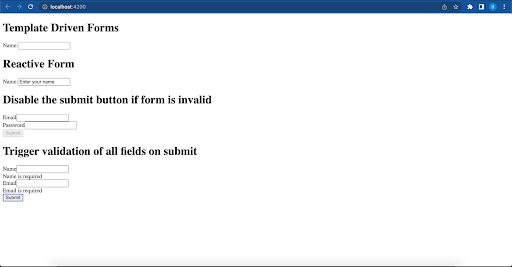
Disable the Submit Button If Form is Invalid:
Let’s create a new reactive form:
this.loginForm = this.formBuilder.group({
     email: [null, [Validators.required, Validators.email]],
     password: [null, Validators.required],
   });
In the code above we have an Angular Reactive Forms with only 2 fields: email and password and both are required. Now that we have created the form, we’ll see how to render it. Let’s take a look at the html code:
<form class="form-horizontal" [formGroup]="loginForm">

     <div class="form-group">
       <div class="col-sm-12">
         <label for="email" class="control-label">Email</label>
         <input type="text" id="email" class="form-control" formControlName="email">
       </div>
     </div>

     <div class="form-group">
       <div class="col-sm-12">
         <label for="password" class="control-label">Password</label>
         <input type="password" id="password" class="form-control" formControlName="password">
       </div>
     </div>
     <button type="submit" class="btn btn-primary" [disabled]="!loginForm.valid">
       Submit
     </button>
   </form>
As you can see in the UI, submit button is disabled if one of the two fields is empty.
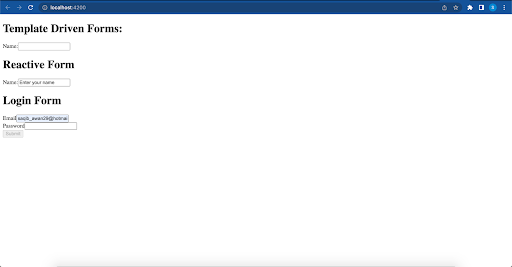
The submit button will only be enabled if the form is valid ([disabled]=”!form.valid”), meaning the email must be informed (and also must be a valid email) and the password also must be informed.
Please note that in this form we do not have any visual indicator that the email and password fields are required. We also do not display any validation error message. So the user has to guess that something is missing before the submit button is enabled.
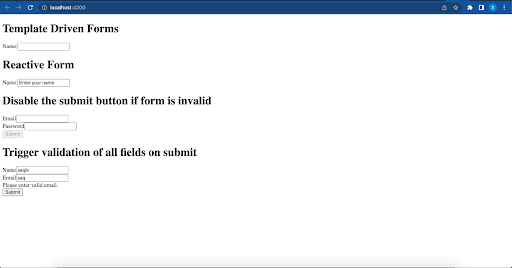
Trigger Validation of All Fields on Submit
Let’s create a new form:
this.submitForm = this.formBuilder.group({
     name: new FormControl('', [Validators.required, Validators.minLength(3)]),
     email: new FormControl('', [Validators.required, Validators.email])
   });
In the above code, we have created a formGroup named as submitForm and in that formGroup there are a couple of formControls as ‘name’ and ‘email’. Both formControls have validations to be applied and here we will show the error message on the submission of the form. So let’s create a submit method to handle the event of submit:
submit(){
   this.submitted = true;
   this.submitForm.markAllAsTouched();
 }
In this method, we are making all the form fields touched and in this way, the error message will show if any of the form fields have an invalid value. Here we are making the flag value true to confirm that form is submitted and UI can show the error messages now.
Let’s render the form on UI:
<form [formGroup]="submitForm" (ngSubmit)="submit()" #myform="ngForm">

     <div class="form-group">
         <label for="name">Name</label>
         <input
             formControlName="name"
             id="name"
             type="text"
             class="form-control">
         <div *ngIf="submitForm.get('name')?.hasError('required') && submitted" class='alert alert-danger'>Name is required</div>
     </div>

     <div class="form-group">
         <label for="email">Email</label>
         <input
             formControlName="email"
             id="email"
             type="text"
             class="form-control">
         <div *ngIf="submitForm.get('email')?.hasError('required') && submitted" class='alert alert-danger'>Email is required</div>
         <div *ngIf="submitForm.get('email')?.hasError('email') && submitted" class='alert alert-danger'>Please enter valid email.</div>
     </div>

     <button class="btn btn-primary" type="submit">Submit</button>
 </form>
If the user presses the submit button without filling any field then both form fields error will show:
If enter the name but not entered a valid email and submit the form then the following error will show:
Conclusion:
You have now seen both template-driven forms and reactive forms. When a user touches any input field but does not enter a value, an error message will be shown. As we can see Angular has great support for forms and provides some under-the-hood useful features to validate forms.
You can find the full example on Github.
