
Table of Contents
Test-driven development is the single most powerful tool you have for preventing bugs within your application. That’s not my opinion but it’s a scientifically proven fact that in exchange for effort and productivity, you get better quality software that is more maintainable long-term. Lucky for you angular comes with jasmine and karma so Angular unit testing is really easy to get started.
What is Angular Unit Testing?
It refers to testing the business logic of a small and isolated unit of code to verify the correctness of its behavior. You are going to test the code which you have written it will take care of code coverage whether you have covered all the scenarios or not. Unit testing ensures that all code meets quality standards before it’s deployed. This ensures a reliable engineering environment where quality is paramount. Throughout the product development life cycle, unit testing saves time and money and helps developers write better code, more efficiently.
What is Jasmine?
Jasmine is an open-source testing framework for JavaScript.
Jasmine is a behavior-driven development testing framework
- In BDD tests are written in non-technical language that everyone can understand.
- BDD focuses more on testing the behavior of code instead of implementations.
It does not require any other JavaScript framework.
Jasmine has easy-to-read syntax, making it easy to understand.
Jasmin supports asynchronous testing.
Jasmine has tested double functions called spies, A spy can stub any function and track all calls to it and its argument.
What is Karma?
Karma is an open-source test runner for JavaScript created by the angular team.
Karma can be easily integrated into your project and makes it easy to execute tests using CLI.
Karma is useful for executing the tests on browsers, and other devices like phones, and tablets.
Karma can be configured with different test frameworks including Jasmine, Mocha, and Quit.
Karma can be configured with continuous integration tools like Jankins, Travis, or Semaphore.
Why you should unit test Angular apps
Unit testing is a crucial practice for any software development project, including Angular apps. Here are some reasons why you should unit test your Angular apps:
-
Early detection of bugs:
Unit testing can help catch bugs early in the development cycle before they cause more significant problems. Unit tests isolate and test individual units of code, allowing developers to identify and fix issues quickly.
-
Code quality improvement:
Unit testing can help improve code quality by encouraging developers to write more modular, maintainable, and reusable code. Writing unit tests requires breaking code down into smaller, testable units, which can lead to more readable, scalable, and maintainable code.
-
Confidence in code changes:
Unit testing can provide confidence in code changes. Running unit tests after making changes to the codebase can quickly validate that everything is still functioning as expected, and no new issues have been introduced.
-
Time savings:
Unit testing can save time in the long run. Catching bugs early in development can save significant time and resources compared to identifying and fixing bugs later in the development cycle or even after deployment.
-
Improved collaboration and documentation:
Unit tests can help with collaboration and documentation. Tests can serve as a form of documentation, showing how individual units of code should work. Additionally, writing tests can help developers communicate their assumptions and expectations for the codebase.
Looking for an Angular Development Team?
Share the details of your request and we will provide you with a full-cycle team under one roof.
Setup Angular Project and Run Sample Test
To create a new Angular project run the following command:
ng g new app-name
After entering the above command you will ask for angular routing and stylesheet format. Select your choice.
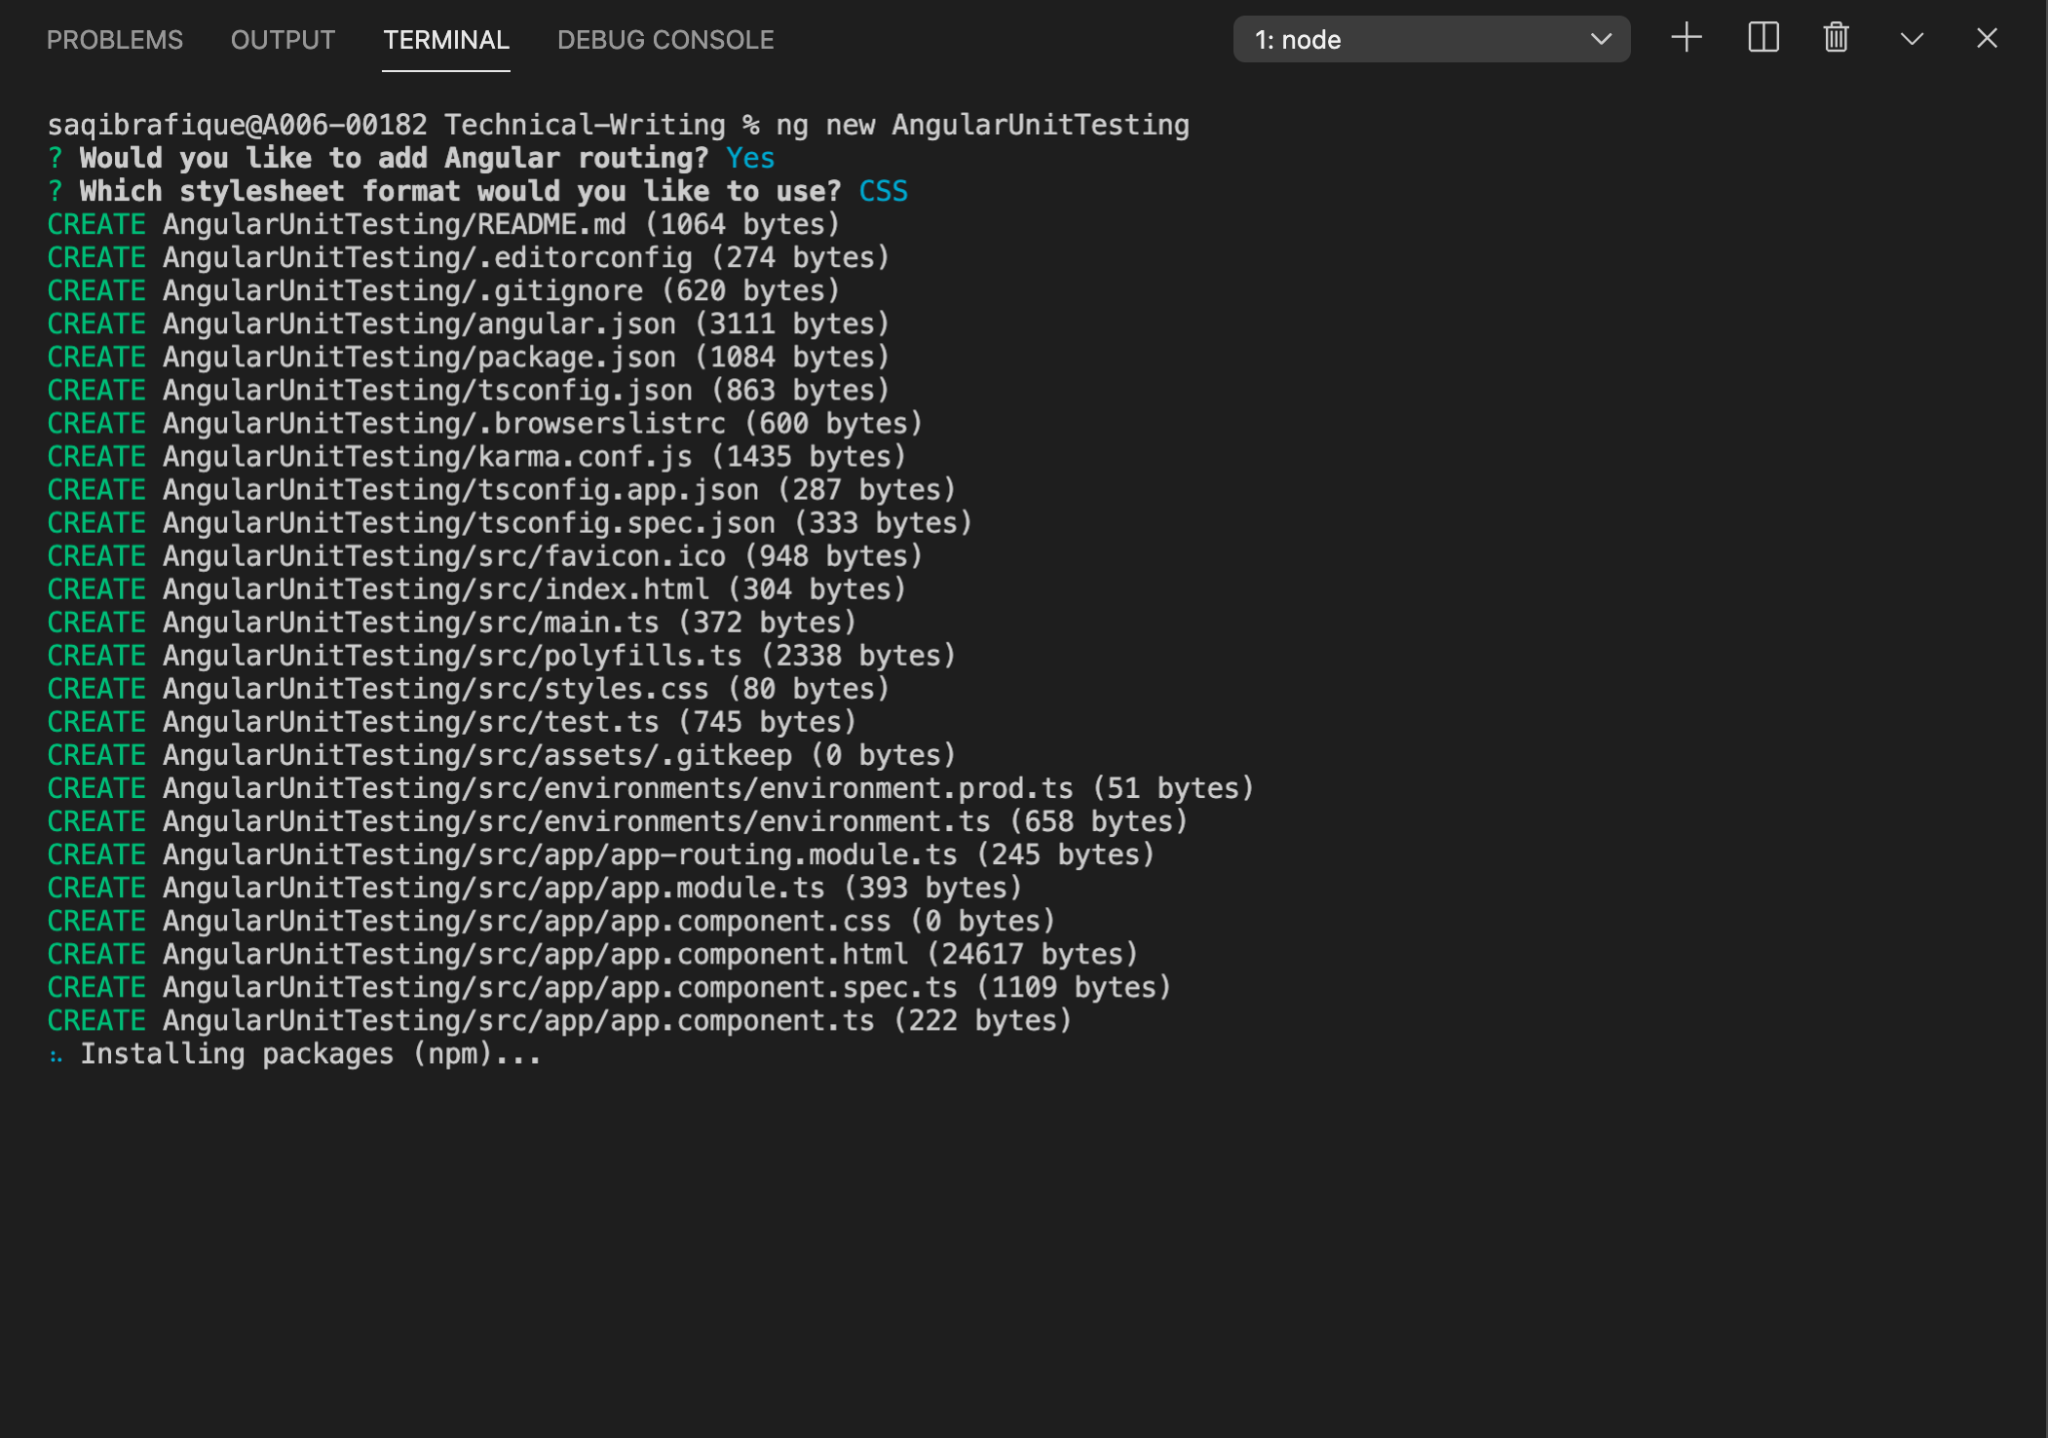
When packages will install successfully then you have a project with an app and many other files as follows:
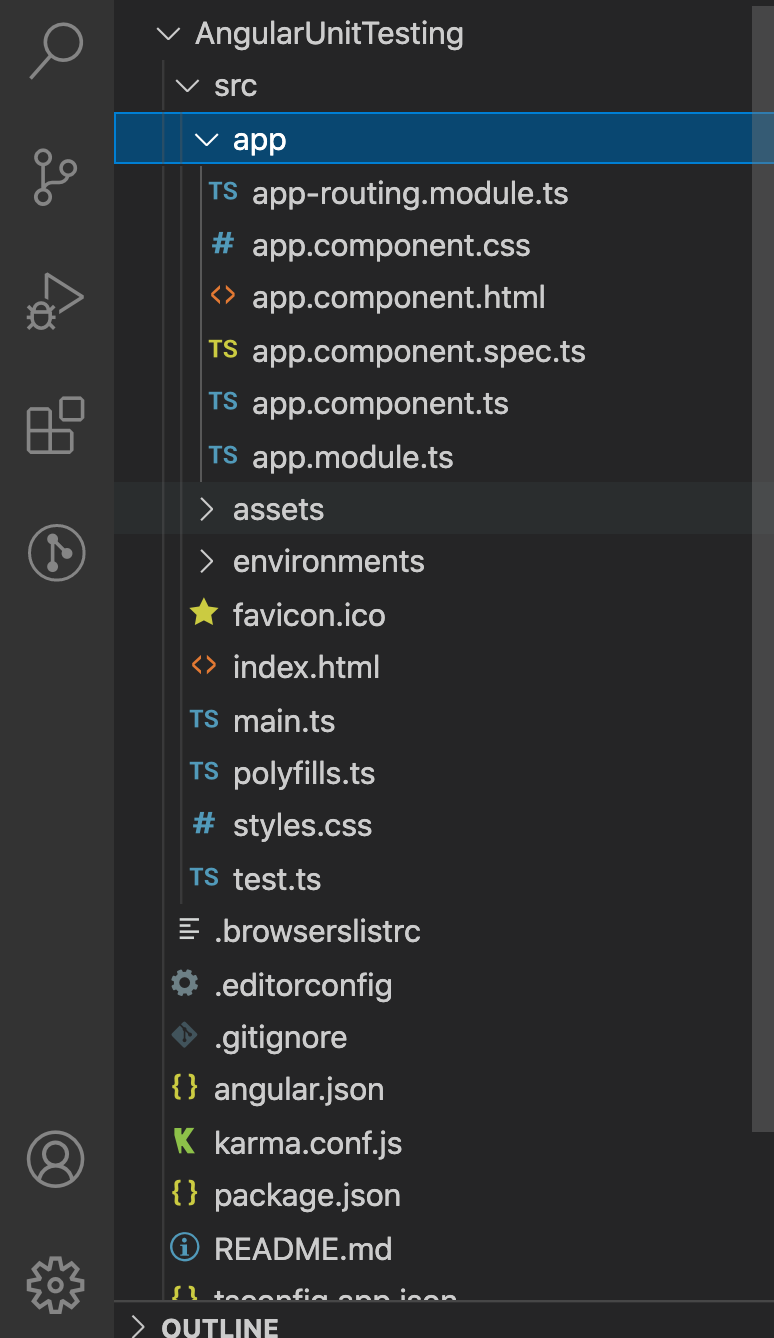
As you can see we have a file named app.component.spec.ts. This is the file that is used to perform unit testing and we have a different test written by default as follows:
import { TestBed } from '@angular/core/testing';
import { RouterTestingModule } from '@angular/router/testing';
import { AppComponent } from './app.component';

describe('AppComponent', () => {
 beforeEach(async () => {
   await TestBed.configureTestingModule({
     imports: [
       RouterTestingModule
     ],
     declarations: [
       AppComponent
     ],
   }).compileComponents();
 });

 it('should create the app', () => {
   const fixture = TestBed.createComponent(AppComponent);
   const app = fixture.componentInstance;
   expect(app).toBeTruthy();
 });

 it(`should have as title 'AngularUnitTesting'`, () => {
   const fixture = TestBed.createComponent(AppComponent);
   const app = fixture.componentInstance;
   expect(app.title).toEqual('AngularUnitTesting');
 });

});
This spec file is the actual file where our Jasmine code will run. When we are generating a new component, module, service, pipe, or service then this spec file will always be generated. Here you can see there is a test suite that is already written for our component and in this suite three test cases will show us how our app will be tested. To run the sample test we need to run the following command:
ng test
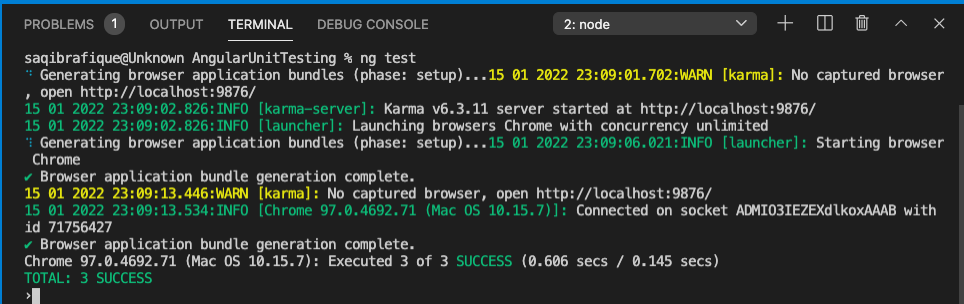
This command will execute the test cases by using Angular CLI and show us results on a web browser:

As you can see our three test cases succeeded. In this report, we have test cases and their status with execution time.
Karma Configuration
The configuration file is put together by exporting a function that accepts the configuration object that Karma is going to work with. Modifying certain properties on this object will tell Karma what it is we want to do. Let’s go over some of the key properties used in this configuration file:
Frameworks
Framework is a list of the testing frameworks we want to use. These frameworks must be installed through NPM as a dependency in our project or/and as a Karma plugin.
Plugins
Plugins that integrate karma with testing frameworks like Jasmine or build systems like Webpack.
Files
Files are a list of files to be loaded into the browser/testing environment. These are loaded sequentially, so order matters. The file list can also take the form of a glob pattern as it becomes rather tedious to manually add a new file for each new testing script created.
In the angular2-redux-starter karma.conf.js, we have put the testing files we wish to include in a separate file – src/tests.entry.ts, which includes a required call using a regex pattern for importing files with the .spec.ts file extension. As a project grows larger and the number of files to include grows in complexity it is good practice to put file imports in a separate file – this keeps the karma.conf.js file cleaner and more readable.
Preprocessors
Preprocessors allow for some operation to be performed on the contents of a unit testing file before it is executed. These operations are carried out through the use of Karma plugins and are often used for transpiling operations. Since we are writing unit tests in TypeScript, .ts files must be transpiled into plain Javascript in order to run in a browser-based environment.
In angular2-redux-starter this process is done with webpack, so we explicitly invoke the web pack processor on all of our testing files (those ending with .spec.ts). We also load any source map files originating from transpiration through the source map processor.
Webpack
If the project uses webpack, then the property webpack in the Karma configuration object is where we can configure webpack with Karma. In the angular2-redux-starter, plugins, and loaders are exported from their own files to be imported by both the webpack config and the karma config, making the configuration object smaller.
Using webpack, we can configure how to bundle our unit tests; that is, whether to pack all tests into a single bundle, or each unit test in its own bundle, etc. Regardless, unit tests should not be bundled with the rest of the application’s code (especially in production!). In angular2-redux-starter we have opted to bundle all unit tests together.
CoverageReporters and reporters
coverageReporter is used to configure the output of results of our code coverage tool (our toolchain uses Istanbul). Here we have specified to output the results in JSON and HTML. Reports will appear in the coverage/ folder.
Reporters is a list of reporters to use in the test cycle. Reporters can be thought of as modular tools used to report on some aspect of the testing routine outside of the core unit tests. Code coverage is an example of a reporter – we want it to report on how much of our code is being tested. There are many more reporters available for Karma that can aid in crafting your testing workflow.
Environment configuration
Port, browsers, and single-run configure the environment our unit tests will run under. The browser’s property specifies which browser we want Karma to launch and capture output from. We can use Chrome, Firefox, Safari, IE, or Opera (requires an additional Karma launcher to be installed for each respective browser). For a browser-less DOM instance, we can use PhantomJS (as outlined in the toolchain section).
We can also manually capture output from a browser by navigating to http://localhost:port, where the port is the number specified in the port property (the default value is 9876 if not specified). The property singleRun controls how Karma executes, if set to true, Karma will start, launch configured browsers, run tests, and then exit with a code of either 0 or 1 depending on whether or not all tests passed.
Write and Execute the First Test Suite with Unit Test Case
To execute the test case we need to have a functionality to be tested. So, let’s create a new file named firstFunction.ts. Here we have a function addition that is taking two parameters firstNumber, and secondNumber, and return the addition of these two numbers. Now I want to test the functionality of this method by writing the test case in a spec file. We need to create a spec file for this named firstFunction.spec.ts.
Every test suit should start with the described block that is used to contain different test cases together. It has two parameters description and spec definition. Now we need to create our test cases in this described block, it will use here to define unit-test cases it has multiple parameters but here we are using only two parameters description and definition of unit-test cases.
In the first unit-test case, I want to test whether our addition function will work fine or not. So to do this I need to import that function in our spec file and then call that function in its block with parameters (10, 20) It should return 30. We can test this by using the Jasmine function expect(), which will verify whether the incoming output is equal, contain, to be an expected output or not. It is going to help us to assert that the functionality returns the given output. Finally, our spec file will look as follows:
import { addition } from "./firstFunction"

describe('Test Addition', () => {
   it('should add two numbers', () => {
       const result = addition(10,20);
       expect(result).toBe(30);
   })
})
To run the spec file we need to write the command ng test. After execution of this command you can see the updated report will generate by Karma on the browser as follows:

As you can see now we have a new test suite with the description ‘Test Addition’ and under this suite, we have a test case ‘should add two numbers’ passed. So congratulation our first test case is executed and passed successfully. Now let’s try to fail our test case by expecting a wrong value.

As you can see now one test case is failing as we are expecting the addition of 10 and 20 toBe 35 which is wrong and reflected by our Karma report.
Understand, How to Test Attribute Directives
An attribute directive can modify the behavior of an element, component, or another directive.
<div HelloDirective userInfo=”username”></div>
Here is a simple example of HelloDirective which will change the behavior of a given div. We want to test the behavior of this HelloDirective. First, create the directive HelloDirective by using the command:
ng g directive
This command will ask you for the name of the directive and then create a directive for you.
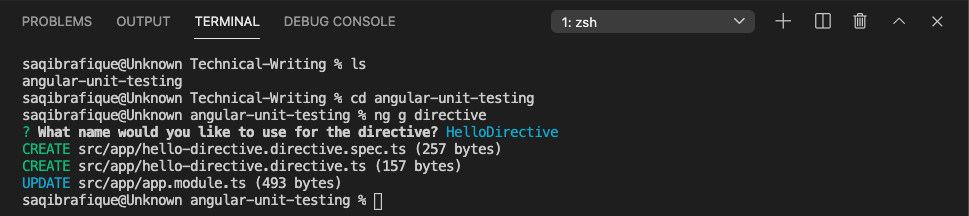
Along with the .ts file you have the .spec.ts file created for this directive. Our directive will look as follows:
import { Directive, HostBinding, HostListener, Input, OnInit } from '@angular/core';

@Directive({
 selector: '[appHelloDirective]'
})
export class HelloDirectiveDirective implements OnInit {

 @Input('userInfo') username: string = '';
 @HostBinding('style.background-color') backgroundColor: string = '';
 @HostBinding('style.font-size') fontSize: string = '';
 @HostBinding('innerHTML') innerHTML: string = '';

 constructor() { }

 ngOnInit() {
   this.innerHTML = 'Hello ' + this.username;
   this.fontSize = '10px';
   this.backgroundColor = 'green';
 }

 @HostListener('mouseover') onMouseOver() {
   this.fontSize = '28px';
   this.backgroundColor = 'orange';
 }

 @HostListener('mouseout') onMouseOut() {
   this.fontSize = '18px';
   this.backgroundColor = 'green';
 }
}
Here we are getting input from the element and changing the behavior of the input and the element. On MouseOver and MouseOut our div element will change the behavior. We need to test whether our directive will work fine or not. To do this we need to use this HelloDirective in a component and then write test cases in that component. Let’s create a new component for this purpose by using the command:
ng g component custom-directive.
<div class="row">
   <div class="col-md-6">
       <input type="text" [(ngModel)]="username">
       <button (click)="onSubmit()">Submit</button>
   </div>
</div>
<div class="row">
   <div class="col-md-6">
       <div id="customDiv" *ngIf="isSubmitted" appHelloDirective [userInfo]="username"></div>
   </div>
</div>
import { Component, OnInit } from '@angular/core';

@Component({
 selector: 'app-custom-directive',
 templateUrl: './custom-directive.component.html',
 styleUrls: ['./custom-directive.component.css']
})
export class CustomDirectiveComponent implements OnInit {

 isSubmitted = false;
 username = '';

 constructor() { }

 ngOnInit(): void {
 }

 onSubmit() {
   this.isSubmitted = true;
 }
}
Now we have a new component, here we will get input from a user and then show that input to the user and check our directive behavior as well. For validating the directive behavior we need to write test cases in the custom-directive.component.spec.ts file.
In the beforeEach function for our test suite, we configure a testing module using the TestBed class. This creates a test Angular Module which we can use to instantiate components, perform dependency injection, and so on. The testBed is a mock environment to run Angular 2+ component tests without the browser. TestBed.createComponent() creates an instance of the Component, adds a corresponding element to the test-runner DOM, and returns a ComponentFixture.
So, in our test suite, we have some default test cases written for the component. We will add new test cases for directive testing. First, verify that only the div will be visible when to Submit button will click, and next verify the inner HTML, and backgroundColor of the div as follows:
import { DebugElement } from '@angular/core';
import { ComponentFixture, TestBed } from '@angular/core/testing';
import { FormsModule } from '@angular/forms';
import { By } from '@angular/platform-browser';
import { HelloDirectiveDirective } from '../hello-directive.directive';

import { CustomDirectiveComponent } from './custom-directive.component';

describe('CustomDirectiveComponent', () => {
 let component: CustomDirectiveComponent;
 let fixture: ComponentFixture;
 let debugElement: DebugElement;

 beforeEach(async () => {
   await TestBed.configureTestingModule({
     declarations: [ CustomDirectiveComponent, HelloDirectiveDirective ],
     imports: [FormsModule]
   })
   .compileComponents();
 });

 beforeEach(() => {
   fixture = TestBed.createComponent(CustomDirectiveComponent);
   component = fixture.componentInstance;
   fixture.detectChanges();
   debugElement = fixture.debugElement;
 });

 it('should create', () => {
   expect(component).toBeTruthy();
 });

 it('should test the directive for its change to div', () => {
   component.username = "Saqib";
   let button = debugElement.query(By.css('button'));
   button.triggerEventHandler('click', {});

   fixture.detectChanges();
   let div = debugElement.query(By.css('#customDiv'));
   expect(div.nativeElement.innerText).toContain('Hello Saqib');
   expect(div.nativeElement.style.backgroundColor).toBe('green');
 })

 it('should test the directive on mouse events', () => {
   component.username = "Ali";
   let button = debugElement.query(By.css('button'));
   button.triggerEventHandler('click', {});

   fixture.detectChanges();
   let div = debugElement.query(By.css('#customDiv'));
   div.triggerEventHandler('mouseover', null);
   fixture.detectChanges();
   expect(div.nativeElement.style.backgroundColor).toBe('orange');
   expect(div.nativeElement.style.fontSize).toBe('28px');

   div.triggerEventHandler('mouseout', null);
   fixture.detectChanges();
   expect(div.nativeElement.style.backgroundColor).toBe('green');
   expect(div.nativeElement.style.fontSize).toBe('18px');
 })
});
Next, we’ll check the mouseOver and mouseOut events of the element by the test case.
So finally, our Karma is also updated with new test cases added as follows:
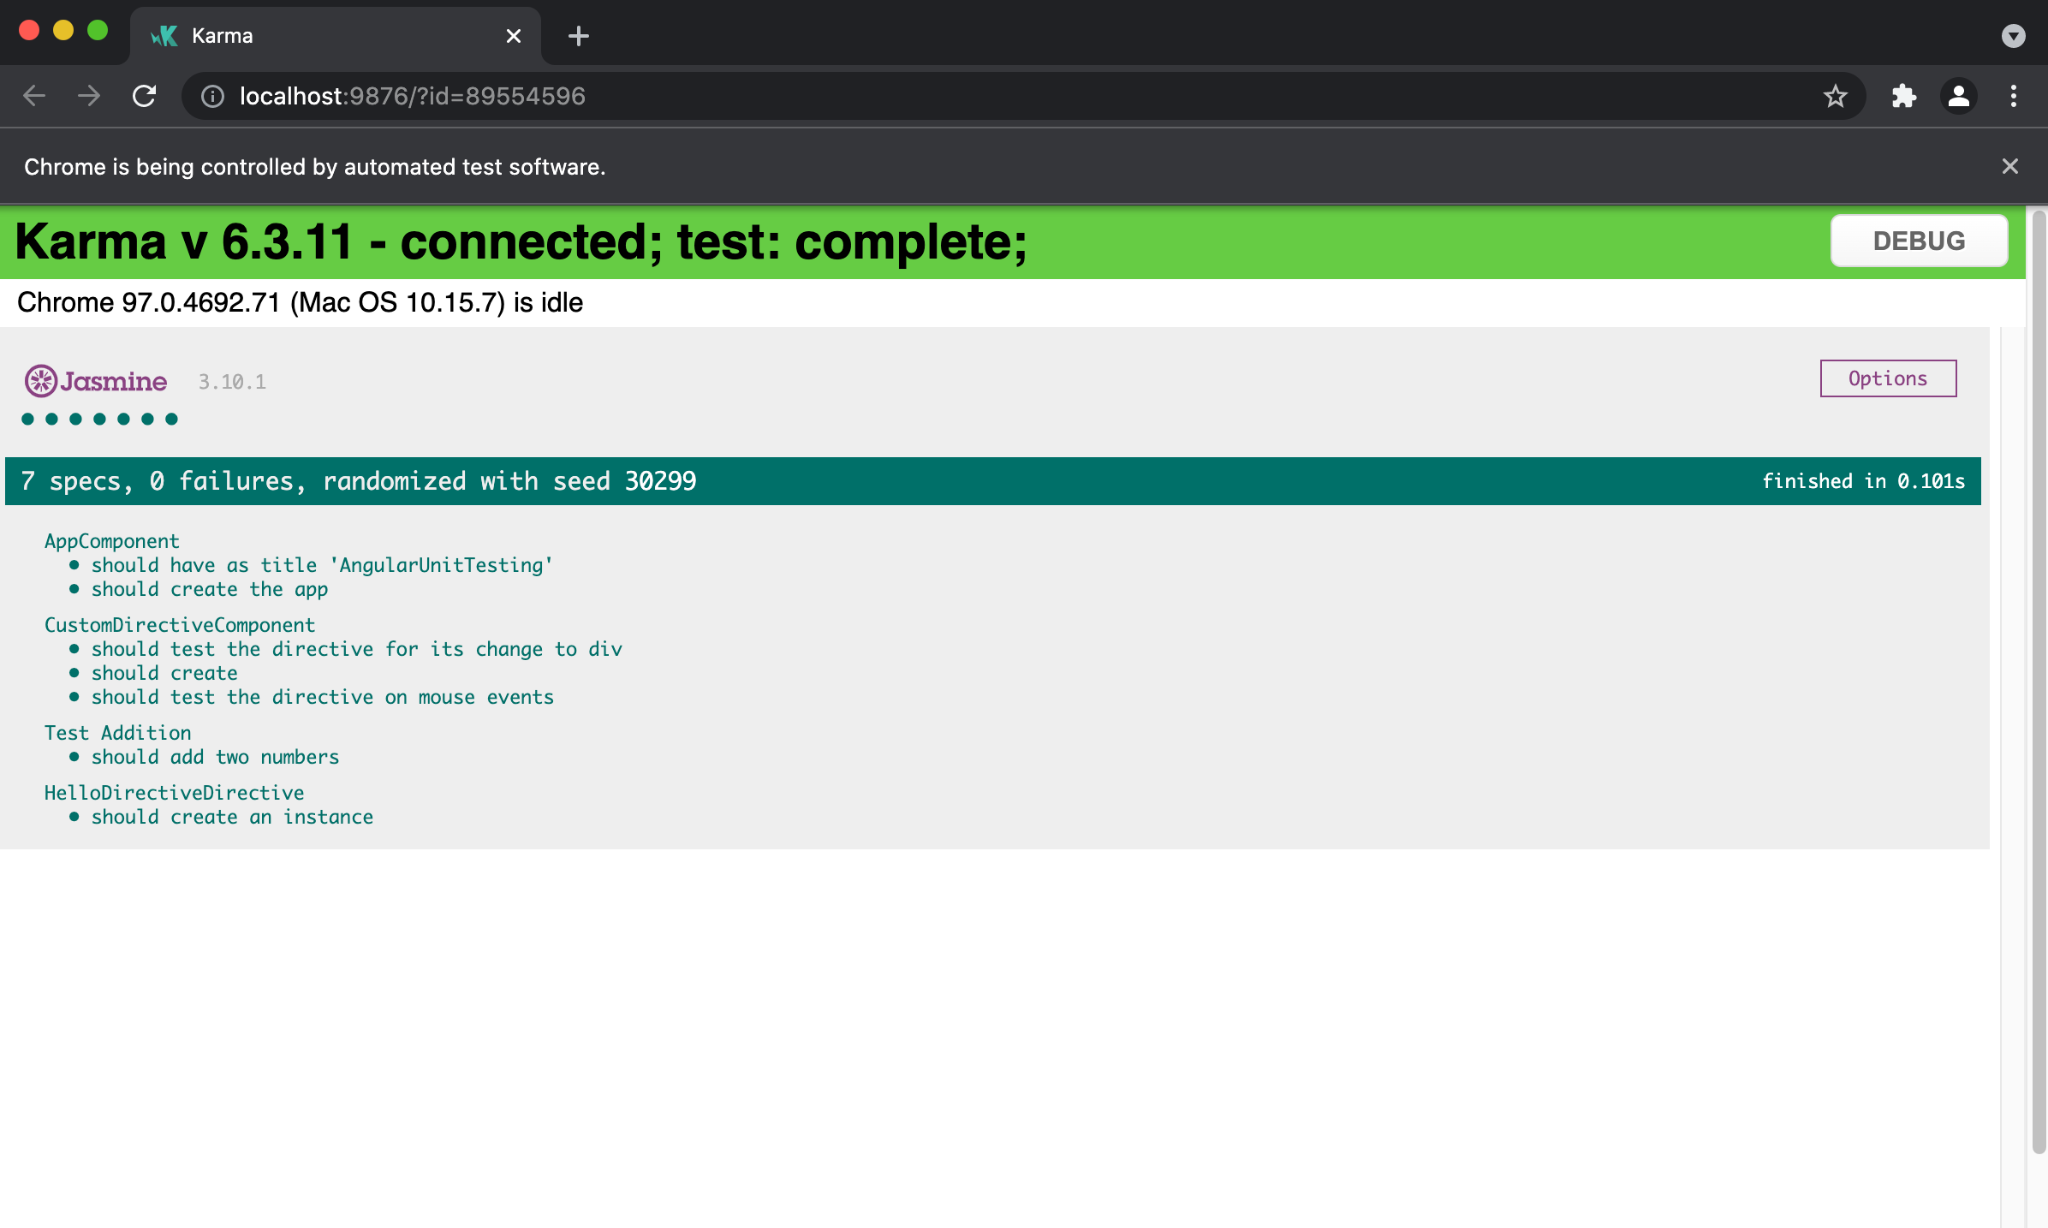
Conclusion
We’ve covered Angular unit testing. You’ve learned more about the fundamentals of unit testing, and how to use best-of-bread tools—such as Karma and Jasmine—to perform efficient Angular component testing. Overall, Angular unit testing saves time, helps find bugs early, and inspires confidence in your application’s code. Angular ensures that test results are viewed in your browser. This will give a better visualization of the test results.
The source code for the project is available on the Github profile.
